Elite Custom PC Building: The Ultimate Optimization Guide

Building a custom Personal Computer (PC) is a highly rewarding endeavor that grants unparalleled control over performance, aesthetics, and longevity. However, transforming a collection of parts into an optimized, high-performance machine requires a strategic understanding of component synergy, thermal management, and deep system tuning. This comprehensive guide, written for the discerning enthusiast and focused on search engine optimization (SEO) principles, dives into the critical stages of planning, assembly, and fine-tuning to ensure your custom PC delivers maximum power per dollar and stands the test of time.
I. Strategic Component Selection: Avoiding the Bottleneck Trap
The foundation of an elite PC is laid not during assembly, but during the parts selection process. The goal is to achieve perfect component synergy, where no single part severely limits the performance of another—a phenomenon known as a bottleneck.
A. The CPU-GPU Power Balance
The relationship between the Central Processing Unit (CPU) and the Graphics Processing Unit (GPU) is the single most critical factor in a performance build, particularly for gaming and content creation.
A. Understanding Workload: For modern AAA games played at high resolutions (1440p or 4K), the workload is typically GPU-bound, meaning the GPU is the primary limiting factor. For competitive esports titles, simulation games, or professional applications like video editing and software compilation, the workload is often CPU-bound.
B. Matching Performance Tiers: A common mistake is pairing a flagship GPU (e.g., an RTX 4090) with an entry-level CPU (e.g., a Core i3 or Ryzen 3). This creates a severe CPU bottleneck, leaving the powerful GPU underutilized. Conversely, an extreme CPU paired with a budget GPU creates a GPU bottleneck, resulting in low frame rates despite fast processing. Always aim for components within the same performance tier (e.g., a high-end Core i7/Ryzen 7 with a high-end RTX 4070 Ti/Radeon RX 7800 XT or higher).
B. Memory Optimization: Speed, Timings, and Capacity
Random Access Memory (RAM) speed is a critical, often-overlooked performance lever, especially for AMD Ryzen CPUs, which benefit significantly from high-speed memory due to their Infinity Fabric architecture.
A. Enabling XMP/EXPO: Modern RAM operates at a slow default frequency until the user manually enables the Extreme Memory Profile (XMP) (for Intel platforms) or EXPO (for AMD platforms) in the BIOS. This simple, non-overclocking step allows the RAM to run at its advertised, much faster speed (e.g., 6000MHz instead of 4800MHz), resulting in immediate, tangible performance boosts.
B. Choosing DDR5: For future-proofing, DDR5 RAM is the current standard. Look for kits with a speed of at least 6000MHz and low CAS Latency (CL) values (e.g., CL30 or CL32) for optimal responsiveness and throughput.
C. Capacity for Longevity: While 16GB is the minimum for gaming, 32GB of RAM is the current standard for future-proof builds, providing necessary headroom for demanding applications, multitasking, and resource-hungry operating systems.
C. Power Supply Unit (PSU) Headroom
The PSU is the lifeblood of the system. Choosing an inadequate unit risks system instability, component damage, and severely limits future upgrades.
A. Efficiency Rating: Opt for at least an 80 PLUS Gold rated PSU. This certification guarantees superior efficiency (less wasted heat, lower electricity bills) and higher-quality internal components, translating to better long-term reliability.
B. Wattage Sizing (The Overhead Rule): Always choose a PSU with at least 20-30% more wattage than your estimated peak system draw. This overhead ensures the PSU operates in its most efficient range (typically 50-70% load) and provides the necessary power headroom for sudden spikes or future component upgrades (like a more powerful GPU). For high-end gaming rigs, a minimum of 850W is generally recommended.
II. Thermal and Cooling Mastery: Sustained Performance

A high-performance PC generates significant heat. Effective thermal management is not just about keeping components safe; it’s the key to sustained peak performance, preventing the system from engaging thermal throttling (automatic performance reduction to lower heat).
A. CPU Cooling Solutions
The choice of CPU cooler directly impacts the CPU’s ability to maintain high boost clocks.
A. High-End Air Cooling: Modern, dual-tower air coolers are exceptionally effective, offering performance comparable to many liquid coolers while being generally quieter, more reliable (no pump to fail), and easier to install.
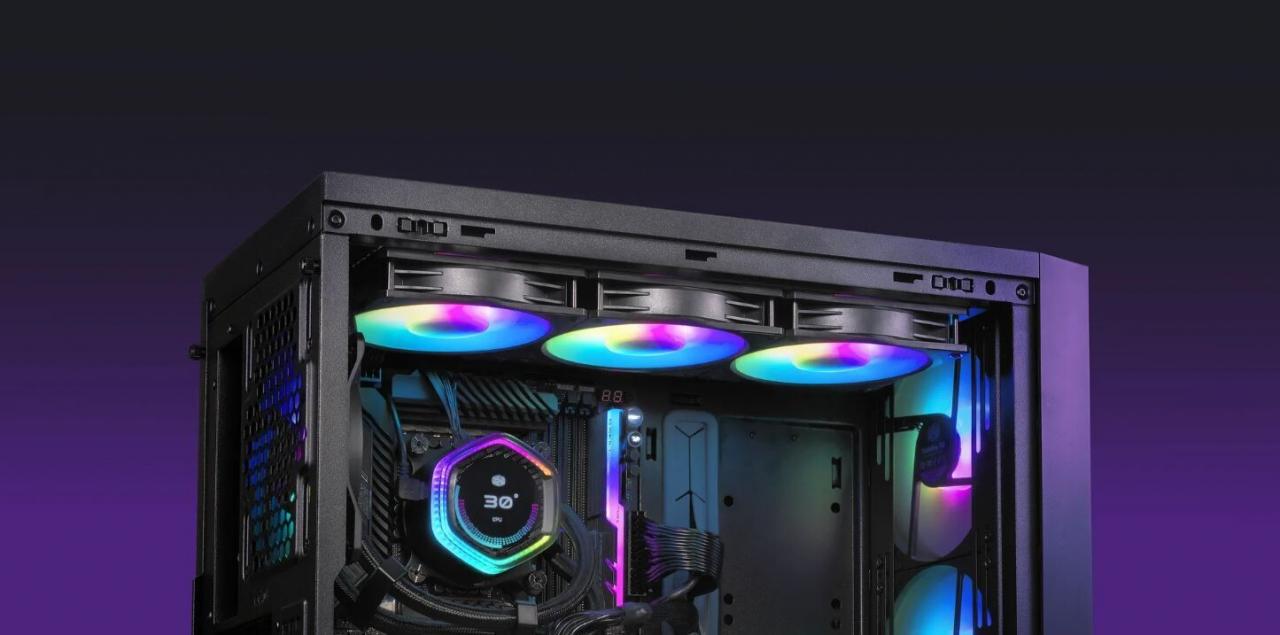
B. All-in-One (AIO) Liquid Cooling: AIO coolers offer superior heat dissipation for extreme processors (especially those being manually overclocked) and often provide a cleaner aesthetic. The key metric is the radiator size; a 360mm radiator is typically the best choice for high-end CPU cooling.
C. Thermal Paste Application: A clean, optimized application of high-quality thermal paste (using the ‘pea’ or ‘X’ method) between the CPU Integrated Heat Spreader (IHS) and the cooler cold plate is non-negotiable for maximum heat transfer.
B. Optimized Chassis Airflow
The best cooler is useless if the chassis airflow is poor. Creating a well-defined air path is crucial for cooling all components, including the GPU and VRMs (Voltage Regulator Modules).
A. Positive Pressure Configuration: Aim for a “positive pressure” setup, where the number of intake fans (pushing air in) slightly exceeds the number of exhaust fans (pulling air out). This slightly higher internal pressure forces air out through all chassis gaps, preventing dust from passively entering and settling.
B. Intake vs. Exhaust Placement:
-
- Intake: Front and bottom of the case.
- Exhaust: Rear and top of the case. A common and highly effective setup is three front intake fans and two top/one rear exhaust fans.
C. Cable Management for Airflow
While aesthetics are a factor, cable management’s primary purpose is functional. Excess cables obstructing the path between intake and exhaust fans act as physical barriers to airflow, creating hot spots. Utilize the back of the motherboard tray and zip ties/Velcro to neatly route all cables away from the main air channels.
III. Deep System Tuning: BIOS and OS Optimization
Once the hardware is physically complete, the next phase involves software tuning at the deepest levels—the Basic Input/Output System (BIOS) and the Operating System (OS). This is where marginal gains stack up into significant performance advantages.
A. Essential BIOS Configuration
The BIOS is the gateway to unlocking your hardware’s true potential. Access it immediately upon booting the system (usually by pressing DEL, F2, or F12).
A. XMP/EXPO Activation: As mentioned, this is mandatory. Find the memory settings and select the highest advertised memory profile.
B. Resizable BAR (ReBAR) / Smart Access Memory (SAM) Activation: This technology allows the CPU to access the entire GPU VRAM buffer at once, rather than in small 256MB chunks. This dramatically improves data transfer efficiency between the CPU and GPU in modern titles, offering significant frame rate boosts (especially on AMD’s platform, where it is called Smart Access Memory or SAM). Ensure both the motherboard (in BIOS) and the GPU driver are compatible and enabled.
C. Fan Curve Optimization: Adjust the fan curve to strike a balance between noise and cooling. Set fans to ramp up aggressively only when temperatures approach throttling limits (e.g., 70-80°C) and run quietly during idle or low-load tasks.
D. Power Limit Adjustment (Intel/AMD): On modern CPUs, removing power limits (e.g., enabling Multi-Core Enhancement (MCE) on Intel boards or setting Precision Boost Overdrive (PBO) to “Enhanced” or “Motherboard Limits” on AMD boards) allows the CPU to sustain higher boost clocks indefinitely, provided the cooling system can handle the increased power draw and heat.
B. Operating System (Windows) Optimization
The OS can silently consume resources that would otherwise go to your applications or games.
A. Power Plan Setting: Ensure your Windows power plan is set to “High Performance” or the vendor-specific “Ultimate Performance” setting. The default “Balanced” mode can sometimes delay the CPU’s ability to reach maximum boost clocks.
B. Startup and Background Processes: Use the Task Manager’s Startup tab to disable unnecessary applications that launch at boot. For gaming, disable background recording features, minimize unnecessary system tray applications, and utilize Windows Game Mode for better resource prioritization.
C. Driver Updates: Regularly update the Chipset Driver (from the motherboard or CPU manufacturer’s website) and the latest GPU Drivers (from NVIDIA or AMD). Drivers frequently contain critical performance optimizations for the latest games and applications.
IV. Future-Proofing and Longevity

True optimization involves planning for the inevitable evolution of technology, ensuring your build remains viable and easily upgradeable over a 3-5 year lifespan.
A. The Longevity of the Platform
The CPU and Motherboard platform is the hardest and most expensive part to upgrade.
A. Current-Generation Sockets: When building, commit to the current-generation CPU socket (e.g., AMD AM5 or Intel LGA 1700/1851). These sockets are generally guaranteed to support at least one, and often two, future CPU generations, allowing you to upgrade the CPU without replacing the motherboard.
B. PCIe and M.2 Slots: Select a motherboard that supports PCIe 5.0 (even if your GPU is currently PCIe 4.0) and has multiple M.2 NVMe slots. This ensures you are ready for the next generation of ultra-fast GPUs and PCIe 5.0 solid-state drives (SSDs).
B. Storage Optimization and Expansion
Fast storage reduces load times and improves system responsiveness significantly.
A. NVMe SSD Priority: The boot drive and frequently played games must reside on an NVMe SSD (not a SATA SSD). For a future-ready build, purchase at least a 1TB primary NVMe drive.
B. Expanding Storage: For maximum efficiency, utilize a faster NVMe drive for the OS and a larger, slightly slower (but still NVMe) drive or a high-capacity SATA SSD for mass game storage and media.
C. Case and Cooler Clearance
Always check the dimensional clearances before purchasing.
A. GPU Length: Ensure the GPU you plan to buy (or upgrade to in the future) fits within the length and height constraints of your case.
B. RAM and Cooler Height: If using a large air cooler, verify that the fan assembly does not conflict with the height of your RAM sticks, ensuring full clearance for all components.
By meticulously following these optimization steps—from balanced component synergy and mastering thermal dynamics to fine-tuning the BIOS and OS—your custom PC will not just function, but perform at an elite level, providing years of maximum performance and satisfaction.


